63 Insanely Cool Gadgets That Are Going to Sell Out This December, Ideally As Gifts
It’s 2024, and it’s a heck of a time to be alive. We live in an era where everything we want is available right at our fingertips. But there’s one problem…
There’s so much stuff, it’s hard to keep up to date on the latest gadgets and trends, AND it’s even harder to find real quality reviews and advice on the things we want to buy. I created this list because, like many of you, I was sick of purchasing products that didn’t hold up to my expectations. That and I absolutely love testing out the latest advanced things on the market.
Most of the things I tried didn’t make the cut, and I tested out over 500 different products. This meticulously curated list of cool gadgets and home products includes something for everyone. Everything on this list was personally tested by me and my staff to ensure they would get our seal of approval. Some of these items are super handy to have around the house, some are designed to improve your well-being, but many of them are just plain fun and awesome to own! Get them for yourself or as a gift for one of your friends or family members.
After creating this list, I contacted the people who make them, and I was able to snag exclusive discounted online shopping links for everything listed below, ranging from 50% to a whopping 83% off selected products. Simply click the link of anything that interests you in this page, and your discount will be automatically applied.
Keep reading below to see the hottest gadgets and home products to own in 2024!
EDITORS NOTE: All products selected for this list are shipped from facilities in the USA. 🇺🇸
1. Sonic Glow Brush - Sparkling Clean Teeth In 10 Seconds? Sonic Glow Brush Is The Future Of Tooth Brushing
No matter how long and carefully you brush your teeth, the fact of the matter is that most people do it incorrectly, and many suffer from cavities and gum problems. Sonic Glow Brush is looking to change all of that.
Dentists say that 90% of mouth-related problems are the result of incorrect brushing. But sometimes it seems that no matter how well you brush your teeth, you still end up at a dentist. I myself have issues with weak enamel. I brush my teeth twice a day and floss, but I still have four fillings.
This clever startup called Sonic Glow Brush invented a better version of the toothbrush as a solution to better oral wellness. It’s hailed as “the future of toothbrushing” by multiple publications.
Sonic Glow Brush isn’t your traditional toothbrush. It’s made with precisely angled rows of soft silicone bristles that are designed to simulate the BASS brushing technique recommended by dentists. The bristles cover all your teeth in one go and vibrate to brush off more plaque and bacteria than any other brushing method, and it only takes 10 seconds!
Sonic Glow Brush is one size fits all, and you can even use it with whitening gels to get sparklingly clean teeth. No more boring brushing, bad breath, or worrying that you aren’t correctly taking care of your teeth.
PRO TIP: Sonic Glow Brush is fun for kids and a great way to ensure that they’re brushing their teeth properly and easily.
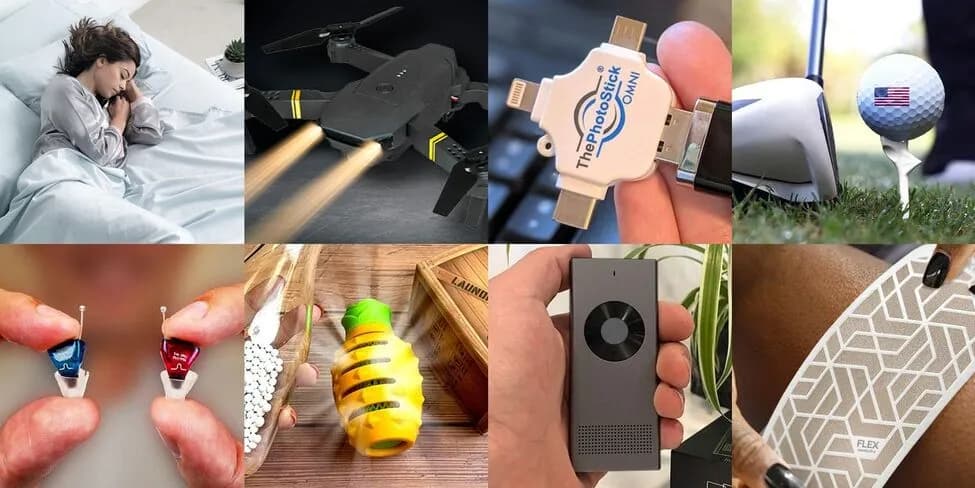
2. Oricle Hearing Aid - The World’s 1st Hearing Aids for Less Than $100
My mother-in-law, to be honest, I’ve never been a big fan of her.
She always seemed absent-minded and self-centered, always talking about herself, never listening.
Gosh, I felt like a fool when I found out the reason she never listened was because she literally couldn’t hear! I mean, she could hear a bit, but with age, her hearing had declined. My husband explained to me that she refused to get hearing aids because they were both too expensive and too uncomfortable.
As much as I was mad at my husband for never explaining the whole situation to me (men! Grrr), I felt bad about how much I judged her for so long, and I wanted a better relationship with her, so I decided to find her a hearing solution that would work and was within my budget.
When I looked into it, I found out that a pair of hearing aids can cost anywhere between $1,000 and $5,000. Sadly, they are typically not covered by private insurance, even though hearing aids can improve your overall health.
Well, that was well outside my budget. That’s when I came across something called an Oricle Hearing Aid. Oricle Hearing Aid is affordable, you don’t need a doctor to prescribe it, and it has excellent reviews. It’s specially tuned for hearing voices, be it a person in front of you or the TV, it makes the sound clear.
My mother-in-law was initially skeptical, but ultimately loves the one I got for her. Our relationship is better than ever.
You might be a good candidate for Oricle if you meet the following criteria:
✅ 40 years or older. ✅ Having trouble hearing. ✅ Living in the U.S.
If you fit the above criteria, click here for 50% off today.
3. Spy Lens Pro - Homeowners Are Trading in Their Doorbell Cams for This
Spy Lens Pro is a compact yet powerful device that offers cutting-edge features without any installation or subscription costs. Enjoy crystal-clear, full HD recordings and live feeds with a 150° ultra-wide-angle lens that captures every corner, day or night, thanks to its superior LED night vision. The magnetized base ensures easy installation on any surface—indoors or outdoors—without the need for cables or batteries.
Monitor your home from your smartphone or computer with user-friendly apps available for both iOS Android. Engage in two-way audio communication, receive instant alerts, and enjoy the peace of mind.
Spy Lens Pro is the smart, portable solution that saves you hundreds annually, making it the most cost-effective upgrade to your home's security.
4. Top Heat Heater - Heat Up Your Room Instantly and Save Thousands a Year On your Electricity Bill
Looking for a better way to heat your home this winter? This remarkable new device called Top Heat can heat any space in under 5 minutes and costs just pennies to operate. Simply plug into any outlet in your home and feel the instant warmth start spreading.
Top Heat uses NASA-inspired PTC ceramic technology that heats up fast and is extremely energy efficient compared to other outdated heating methods. It’s the newest and easiest way to turn your home into a cozy warm oasis this winter without breaking the bank.
Best of all Top Heat requires virtually no installation and barely sips on your electricity to keep you and your family toasty warm all winter. It is also loaded with safety features like auto off function and touch guard, so it’s safe to use around kids and pets, and you don’t need to worry about knocking it over unlike some other heating devices.
5. Synoshi - New Genius Japanese Invention Cleans Virtually Everything In Your House
This Japanese cleaning tool will completely change the way you clean your home.
Synoshi is not only the secret to a cleaner home but also will cut your cleaning time in half. It’s a handheld cordless powerbrush that spins and scrubs everything to a sparkling clean shine in seconds!
No more backbreaking scraping and scrubbing, simply use Synoshi on anything you want to clean. You can use it to clean countertops, showers, and windows, it’ll even make quick work of moldy stained bathroom grout and caulk.
Simply charge it up and turn it on, Synoshi’s brush head spins rapidly to power scrub any surface in seconds with minimal effort.
You’ll be amazed at how much more quickly and easily you’ll be able to keep your home sparkling clean with Synoshi.
6. Vital Flex Core - This Military Method to Lose Weight Is All the Rage
The Vital Flex Core Muscle Stimulator was created by a military defense contractor to use electromagnetic signals to stimulate a workout and help burn fat and build muscle even while you’re sitting down on the couch. They realized what they created and decided to commercialize so even non-military can reap the benefits.
In as little as 15 minutes a day of wearing Vital Flex Core, you can build muscle, increase weight loss, sharpen your abs, relieve cramps, and even improve blood flow. It’s 100% painless and almost completely unnoticeable, so it’s perfect for any age.
7. Miracle Sheets - Simply The Cleanest & Most Comfortable Sheets In The World
Unlock the Ultimate Sleeping Experience with Miracle Sheets!
Traditional bed linens? A hotbed for bacteria and mites. But Miracle Sheets change the game, marrying luxury with groundbreaking hygiene. Imbued with bacteria-fighting silver, they not only feel opulent but also promote cleaner skin.
And that’s not all: with our sheets, you’ll savor the joy of fewer laundry days. Delight in luxury, embrace hygiene, and enjoy refreshed mornings. Dive into the world of Miracle Sheets — because you deserve unparalleled comfort and cleanliness.
8. Tenikle - The Patented Tripod That Holds Your Device On Any Surface, Completely Hands-Free
Forget bulky metal tripods that keep falling over — life is SO much easier with Tenikle! This state-of-the-art phone stand lets you go hands-free whenever you want. The patented, pocket-sized tripod is made from durable, eco-friendly silicone that uses strong flexible arms and powerful suctions cups to securely hold your devices. It works with any smartphone or tablet — and with the Dot Adapters, you can use Tenikle on your phone without taking your case off.
Securely mounts your phone (or tablet, camera, etc) ANYWHERE.
Never block your camera, audio, plugs, or anything else.
Enjoy 360° motion thanks to the extra arm attachment.
Small, compact, and easy to carry.
Immediately mounts your device — no complicated setup.
As seen on TV — over 200K units sold!
Click HERE to start enjoying your phone hands-free with Tenikle today!
9. Drive Bright - "Night Vision" glasses make night driving clear
Poorly lit roads, glare from oncoming headlights, rain, snow, and fog are big contributing factors that driving at night difficult. However, one genius tech company created anti-glare glasses to solve this massive problem – and help you see more clearly at night. Plus, they’re easy to use and fit right over your prescription glasses.
10. VI Shift - Are You Over 50? You Have to Try These Revolutionary Glasses
Tired of squinting trying to read your phone or laptop? Sick of not being able to see people, wildlife, and objects in the distance?
Get VI Shift, revolutionary new reading glasses that do wonders for both up close and far away.
These remarkable, yet highly affordable, reading glasses are fully ADJUSTABLE… Simply use the little dials on the sides of the lenses to adjust the magnification. It takes just seconds to dial in the perfect custom magnification for super clear up-close reading and handy work. Then dial again to see distant objects with complete clarity.
11. PhotoStick Omni - Instantly Back Up ALL Your Photos & Videos… On ALL Your Devices… With Just 1 Click!
Instantly backup your photos and videos with one simple click.
If you have a ton of photos & videos on your computer AND phone, then you already know how tough it is to keep them all organized… and one mistake (on either device) can suddenly result in heartbreak. That’s why we recommend ThePhotoStick OMNI to anyone with a LOT of photos and videos to keep track of – this powerful USB stick finds and saves ALL of your photos and videos on ANY device (phone, tablet, and computer) in a matter of seconds. Plus, they’re easy to share from the free app. It couldn’t be faster or easier!
Finds, sorts, and backs up all your photos and videos in minutes.
Works on ALL computers, phones and tablets (iOS, Android, Windows, Mac, etc.).
Does everything automatically — no complicated setup, logins, or software to install!
Automatically organizes your files neatly into folders so they’re easy to find.
Holds up to 120,000 photos and videos – all the storage you’ll ever need!
Over 1,500,000 people already use ThePhotoStick OMNI.
12. Stealth Bird 4K Drone - Get a $1000 Drone for only $99
Personal drones are a hobby that almost everyone can enjoy. Whether you’re an avid outdoors enthusiast or just enjoy flying around and taking video, everyone kids and adults will love flying drones. Normally, drones are prohibitively expensive, with some costing upwards of thousands of dollars. Most drones are also super bulky and a bit of a pain to use.
The Stealth Bird 4K Drone, however, solves both these problems. At a price tag of just $99, it absolutely blows the competition away. It comes fully equipped with a 4K HD camera capable of taking full high def pictures and video. It is easy to fly for beginners and also nimble enough for pros. It has a signal range of almost a whole mile and a battery life equal to that of the most expensive drones on the market.
On top of that, the Stealth Bird 4K Drone is extremely portable. It folds up so you can fit it in a backpack, and it’s super lightweight so you can take it with you on any adventure without it weighing you down. This makes it a must have for campers and hikers, or anyone traveling far from home.
The Stealth Bird 4k Drone makes a great gift for just about everyone, including yourself. Want a top quality drone but don’t want to shell out the big bucks? Look no further than the Stealth Bird 4K Drone.
13. ChargeCard - Never Run Out of Battery on the Go
Are you tired of always running out of battery while out and about? With ChargeCard, you’ll never have to worry about a dead phone again. This ultra-thin charger is designed to fit right in your wallet or pocket, so it’s always within reach. And with its built-in charging cables for USB-C, Lightning, and Micro USB, you can charge your phone, tablet, or other device with ease.
But ChargeCard isn’t just convenient, it’s also powerful. Its ultra-fast charging technology provides a 1.5A charge, meaning you can quickly get your phone back up to 100% battery life. And with a fully charged ChargeCard, you can get up to 30% to 100% emergency battery life, ensuring that you never have to worry about a dead phone when you need it most.
ChargeCard is also backed by billionaire Daymond John and was featured on Shark Tank. Its premium stainless-steel design makes it look just as stylish as your favorite credit card. So why not invest in the revolutionary charger that everyone is talking about?
14. Brite Blaze - Give Your Life a Spark With the Last Utility Lighter You'll Ever Need
Disposable lighters are the worst. They pollute the environment, hurt your fingers, lock up in the cold, and burn through fuel insanely fast. Toss your flimsy gas station lighters in the garbage and make way for the new continuous flame innovation.
This may be the only on-the-go fire starting gadget you'll ever need. The powerful adjustable dual-arc beam instantly sets material on fire, without needing to cup your hand over a flickering flame or worry about running out of fuel. Best of all, it has an easy butane refillable feature, so you’ll never get caught out in the cold again.
Upgrade to a torch lighter that can’t be beat by rain, snow, wind, or cold, thanks to its hardy waterproof casing. Interested? Click here to take advantage of their current offer.
15. Nuubu - The Japanese Way to Remove Body Toxins
Did you know that the ancient Japanese were onto something big with their feet? Yep, those little tootsies are packed with super-sensitive nerve endings, and all kinds of body systems run through them. But seriously, when's the last time you gave your feet some love to fend off and fix all sorts of issues?
Introducing Nuubu feet patches – made from a secret blend of herbs passed down for centuries. The Japanese had this wild notion that these patches could boost blood flow in your feet and keep nasty diseases at bay through some good ol' foot therapy.
You won't believe it until you dive into more details...
16. Turbo Drive RC Car - 2024's Coolest Toy For Kids
Tired of endless screen time? This gesture-controlled RC car performs mind-blowing stunts with just a wave of your hand!
Doctors and scientists have been warning about the effects of excessive screen time on health, making the Turbo Drive RC Car the ideal solution – safe, appealing, durable, and affordable. Over 62,000 happy parents worldwide rave about its ability to get kids off the couch and engaged in outdoor activities.
Play it in your living room or take it to the park, beach, or backyard; the Turbo Drive RC Car conquers any terrain.
The best part? It’s currently available at a 70% discount! Don’t miss this chance to bring laughter and excitement to your family. Order yours now and experience the magic of the Turbo Drive RC Car!
17. Enenece Translator - Instantly Voice Translate Any Conversation (Great for Travel!)
Traveling to another country? Or maybe you’re trying to converse with someone you know in a different language?
Either way, the Enence Translator Device is like having your own personal translator in your pocket. Simply press a button and speak into the device. The Enence Translator Device will recognize the language and translate it back to you in the language of your choice!
For example, you can speak English into it, and it will instantly speak out a Spanish translation, or vice versa. When the person speaks back, it will translate into your native language.
Enence instantly translates 36 different languages, so it’s incredibly useful to converse in over 99% of the world.
Click here to learn more about Enence and grab one for yourself!
18. Hootie - The #1 Women's Personal Safety Alarm - Enjoy Peace of Mind No Matter Where You Are
Author’s Note: “I am gifting these every woman I care about!”
The best thing you can do if you are being threatened is to get the attention of those nearby who can help, QUICKLY. If you are in trouble, simply pull the cap to activate Hootie’s strobe light and ultra-loud siren to safely attract attention and stop any would-be attacker. Hootie empowers women with safety in their everyday lives.
Hootie is a new personal safety alarm that helps deter attackers without using violence. Criminals are bad, dishonorable people, they attack like cowards, and the last thing they want is to be caught.
It’s all the protection you need without the added danger and violence that comes with carrying weapons – making Hootie the ideal modern solution for women to safely and reliably protect themselves.
19. FluffCo Zen Pillow - Hack Your Sleep With The Pillow Recommended By Oprah!
Did you ever wonder why you had such a comfortable, luxurious sleep when you stayed at a 5 Star Hotel?
Fluffco has decoded the luxury of Hotel Pillows and now brings you the identical cloud-like, slumber-inducing pillows, produced in the very same factories as the expensive hotel chains, yet at an astonishingly affordable price.
Say goodbye to tossing and turning at night when you sink into these head-cradling luxury pillows!
Editor’s Tip: Oprah LOVES these pillows and says you can find the exact feeling of “smushiness” to banish head and shoulder pain!
★★★★★ Oh my gosh, they are beyond my expectations!
I have been trying to find the perfect pillow for a couple of years now. I purchased these pillows and oh my gosh they are beyond my expectations!
20. Cosmic Globe - This High-Tech Boomerang Ball Provides Hours of Fun
Looking to get your kids to spend less time on their electronics? Or are you just looking for a fun new toy to play around with for yourself? Cosmic Globe is great fun for the whole family! It may look like just a silly toy, but this high tech gadget glides, floats, and climbs through the air at your command, returning to you like a boomerang!
Play with it inside or outside, it’s equipped with dazzling LED lights that make it loads of fun and attention grabbing for kids. The more you play with Cosmic Globe, the more cool things you can learn to do with it as you learn how to control it! It’s a great, mentally stimulating exercise that helps improve coordination as well.
You can learn to do crazy tricks once you get the hang of playing with it. Play a game of catch with yourself or others, a gentle nudge can float it 50 feet to any target. Toss it upwards and watch it climb high in the air, only to float gently back down into your hands.
Editors Tip: Cosmic Globe is the perfect holiday stocking stuffer and a great crowd pleaser for kids and adults alike.
21. Air Physio - This Australian Made Device Helps Naturally Cleanse And Strengthens Your Lungs & Airways
AirPhysio is an OPEP device that naturally strengthens your breathing, increases lung capacity, and helps to loosen and clear out mucus in your lungs. Simply put, it’s an all natural device that helps you breathe easier!
AirPhysio’s patented technology works to naturally strengthen your respiratory system and improve breathing quickly, you can notice it taking effect in just a matter of days.
This is a great choice for anyone who finds themselves short on breath due to a variety of conditions. AirPhysio can do the following:
Helps relieve symptoms from respiratory conditions.
Completely safe to use – no prescription needed.
Uses the same technology the medical field has used for years.
100% natural – no drugs or refills required!
Also helps with temporary breathing conditions as well.
Easy to use, easy to clean, and lasts for a lifetime.
Rated 4.1 stars with 1800+ reviews – Winner of the Start-Up Of The Year and International Best Product Awards!
22. FitSpresso - Simple “Coffee Trick” Triggers 24/7 Fat Burning and Torches Stubborn Fat Pockets
Doing this helped me finally drop 3 dress sizes after being overweight for years!
More and more people are using this new 7-Second Coffee Loophole that has been proven to trigger massive losses almost overnight.This new ritual is taking the industry by storm, changing everything we knew about body fat and obesity…Renowned Scientists have discovered that this ONE thing could make all the difference between losing pounds or gaining it. Giant diet corporations are doing everything in their power to remove this presentation and get it erased from the internet.
Watch It Now Before It's Too Late!
23. Voltex Vest - Reba McEntire Swears By This "Life Saving Heated Vest" — Calls it the Greatest Invention Known to Man
This innovative vest will keep you toasty warm and comfortable during the cold months of winter. Stylish and comfortable, the VolteX Heated Vest features a built in electric heating system that you can adjust to the perfect comfortable temperature.
On its surface it looks like any other vest, it’s well insulated and is also water and wind resistant. But on the inside it features four unique heating zones designed to deliver heat to your body where you need it most.
The VolteX Heated Vest is fully machine washable and comes in sizes for everyone. It’s unisex style looks great on both men and women. VolteX Heated Vest is highly reviewed by thousands of happy customers. So this winter season stay fashionable and warm at the same time! This vest is selling fast, so grab one while you still can!
24. iMemories - Create Your Own “Family Netflix” With All Your Precious Home Photos & Videos
If you have a ton of old photos and VHS tapes or DVDs stored away in the attic, you’re going to LOVE iMemories – a new service that helps you quickly and effortlessly digitize all your precious family memories from over the years. All you have to do is pack up your photos and videos in the secure box and send it off to the state-of-the-art iMemories lab in Arizona. You’ll receive the originals back safely, along with access to your digital files in a secure location you can share with the whole family. It only takes a few minutes to enjoy a lifetime of memories at your fingertips!
100% Safe – They’ve digitized 15 million memories and never lost or damaged a single one!
Includes FREE online gallery and apps to share your photos & videos.
All your original photos & videos are returned in their original state.
Can often improve the quality of your memories with free enhancement.
Drag-and-drop interface lets you edit your files easily.
More than 2 million families trust iMemories with their family photos!
25. Denta Blast - Remove Stubborn Tartar And Stains From Your Teeth From Home
You brush every day, but let’s talk about the tough stuff… literally: Tartar buildup and stains. It’s near impossible to remove these with brushing alone. Look at the base of your teeth (especially behind your jaw teeth). See any buildup there? THAT is tartar. And it doesn’t go away on its own. It’s also a major cause of bad breath and tooth and gum problems.
This #1-Rated Ultrasonic Dental Pick, however, can remove tartar and staining on your teeth with ease. It’s a special handheld dental pick that vibrates over 20,000 times per minute. These vibrations obliterate plaque and staining while also being very gentle on your teeth.
Denta Blast comes with five strength levels and is also USB powered, so you don’t need to buy batteries. Get one today and say hi to your shiny new smile!
26. Barks No More - Stop Dog Barking with the Push of A Button
Problem: Is dog barking driving you crazy, or do you have a stubborn dog that won’t be trained? Afraid of dogs and worried about your safety?
Solution: Barks No More
Dogs want to please us and make us happy, but sometimes they don’t understand what they should and should not do. It can be challenging and embarrassing dealing with unwanted behaviors. Barks No More uses high-pitched tones, not detectable by humans, that specifically target a dog’s hearing. Use the ultrasonic sound to stop your dog in the middle of unwanted behavior, like barking or chewing on shoes. It is 100% harmless to dogs, humans, and all animals. In order to use it, just point at the dog and press the button. It’s portable and fits conveniently in a pocket.
27. Grounded Footwear - The Shoes That Help With Pain Like No Other
Experience unparalleled comfort and adventure with Grounded Footwear. Designed with cutting-edge ergonomic technology, these shoes offer the perfect blend of durability, support, and style for any terrain.
Whether you're hiking rugged trails, exploring city streets, or simply enjoying the great outdoors, Grounded Footwear’s breathable materials and superior grip ensure your feet stay cool, secure, and comfortable all day long. Don't just step outside—embrace the freedom to explore without limits.
28. Wamona Fire Blanket - Viral Video Erupts After 8 Year Old Starts a Fire and Older Brother Puts it Out With This
There are over 358,000 house fires in the USA every year. Within 3 minutes of a fire in modern day homes, the entire room will already be up in flames. Within the first 60 seconds of a house fire, smoke is so intense and filled with toxicity from plastics that two breaths can cause you to pass out. Almost all of them start small and are controllable. This Fire Wamona Fire Blanket is certified by firefighters and deemed safe to quickly eliminate fires.
It’s lightweight and built for ease of use. From grandparents to kids, the Fire Wamona Blanket works great and can be used by anyone.
What's better than a gift that could be essential in preventing disaster? I'm willing to be they'll thank you later. Click here to prioritize safety for your loved ones.
29. Kailo Flex - The Reusable Pain Patch That Relieves Pain In Seconds & Lasts A Lifetime
Life can be a pain — literally! But thankfully, now we have amazing NATURAL ways to reduce pain – and the clear leader of the pack lately is Kailo Flex. This natural pain relieving patch uses science that’s been around for a while… but it took more than five years of development and thousands of testers to get it in a format like this. It sounds unbelievable, but thousands of people are already using it — and a recent clinical study found that patient pain decreased by 71%!
Works anywhere on your body that you feel pain.
Get relief in less than a single minute!
100% drug free with absolutely zero side effects.
Use on your skin or over clothing — both work great.
Each patch will last for years and comes with reusable adhesives.
Over $3.5 million sold already — proven to reduce pain by clinical studies!
30. Apex Drill - This Compact Shape Shifting Drill + Screwdriver Works In Even The Hardest To Reach Places
Looking for a tool that can handle all of your home repair needs? Apex Drill is like having 10 tools in one. This compact drill comes with its own case with 30+ attachments, including screwdrivers, drill bits, hex ratchets, and more. It’s completely cordless and powered by a powerful battery that lasts for 4+ hours and is simply recharged via USB.
But what makes Apex Drill truly shine is its shapeshifting ability. You can adjust the drill to work at a 90 degree angle, plus it has a flexible head extension, so you can work in even the hardest to reach places. Plus, it’s super compact and doesn’t sacrifice power for size and portability, it’s so light that anyone can use it easily.
The Apex Drill is a must-have tool for any home. Tighten screws, drill holes for hanging pictures, install fixtures, work on your car and bike… the possibilities are endless!
Plus, Apex Drill comes in way cheaper in price than the competition, you’d have to spend hundreds of dollars on several different power tools to do all of the things that Apex Drill can do.
31. Pest Defense - Ensure a Pest-Free Home This Season
This discreet device uses cutting-edge bionic, electromagnetic, and ultrasonic wave technologies that humans and pets cannot hear to create an uncomfortable but non-lethal environment for rodents, cockroaches, mosquitoes, ants, and other undesirable insect and animal guests entering your home.
Simply plug in The Pest Defense, and your home will be completely free of unwanted household pests in no time.
32. Bril - The Automatic Toothbrush Sterilizer That Protects Your Mouth From MILLIONS Of “Bathroom Germs”
Eww! Did you know that your toothbrush is COVERED in nasty (and potentially harmful) germs? Yup – your brush is like a magnet for the millions of germs that float around your bathroom (especially when you flush). You’re putting them in your mouth whenever you brush.. unless you have Bril! This new invention acts as a carrying case and toothbrush holder, but it comes equipped with a safe yet powerful UV light that automatically sterilizes your toothbrush after every use. It’s a must-have for anyone who is conscious about what they put in their mouth…
Proven to kill 99.9% of germs – Bril kills germs on a molecular level by destroying their DNA with safe UV light.
Works on any brush – one size fits all!
Easy to use – simply place your toothbrush in the Bril and it’ll be sterilized by your next brush!
Comes in multiple colors, so you can easily tell whose Bril is whose.
Great for your whole body – Bril kills bacteria that can increase your risk for heart disease, diabetes, and more.
As seen on FOX, CBS, NBC, USA Today, and more!
33. Peeps - NASA Inspired Solution For Cleaning Dirty Glasses (Now Publicly Available)
Peeps is the only glass cleaner that is designed to actually remove bacteria and oil instead of just wiping them around, like sprays and cloths. If you wear glasses, this is something you need to see clearly to avoid attracting germs through your eyes. It’s super easy to use, too — all it takes is one quick swipe to get perfectly clear lenses. Naturally, it also works on sunglasses!
Trusted by more than 20,000 optometrists around the world.
Completely revolutionary and effective.
Cleans perfectly – every. single. time!
Scratch-resistant brush removes dust and all abrasive particles in seconds.
Patented invisible carbon formula removes dirt & oil – instead of spreading it.
Peeps uses the same carbon cleaning technology used by NASA and military personnel to clean their glass and screens – and it’s still receiving rave reviews every day!
34. Therahome Neck Messager - The Ultimate Relaxation Device
With the Therahome Neck Massager it’s like having a personal masseuse wherever you go. Just turn it on and let it alleviate any tension, neck or back pain in just a few minutes.
It’s small and portable so you can use it at home, at the office, when you’re driving or wherever else you want. It’s cheaper than a regular massage but you can use it over and over! It’s the perfect solution for anyone who wants to relax and feel amazing without spending a ton of money on massages.
35. BellyOrb™ - We Bet You’ve Never Tried THIS to Lose Weight!
Dieting makes social outings awkward, and counting macros sucks all your brain power. That’s why the 18 synergistic herbs in BellyOrb™ are so revolutionary — they’re combined in the ideal dosages and packaged in a unique skin patch, so your body directly absorbs the herbal support that it needs! Packed with all-natural ingredients, BellyOrb™ combines the wisdom of ancient herbal medicine with time-release technology. Since it bypasses the digestive system, your body can absorb more of the herbs…and you can see faster results. Even if you’re a veteran dieter, you’ve never tried anything like this before. All you have to do is wear the BellyOrb™ for 8 hours a day, and you’ll start to see a change!
Reduce fat storage with ingredients like Licorice to block fat, Pepper Seeds, and Sichuan Pepper to burn fat.
Boost your energy levels for more productive days.
Detoxify with Longan and Mugwort; support digestion and liver with Clove, Wachayu, and White Peony Root.
Fire up your metabolism to burn more fat, even at rest.
Suppress cravings naturally, so you can eat a more balanced diet.
Improve gut health and support radiant skin.
The first time BellyOrb™ was released, it completely sold out. There’s no telling how long stocks will last!
36. Bed Scrunchie - Wake Up Refreshed and Full of Energy! The Bed Scrunchie Stops Sleepless Nights by Keeping Your Sheets Smooth and Secure
Introducing Bed Scrunchie, the ultimate solution for undisturbed, restful sleep. Say goodbye to wrinkled, loose sheets that bunch up or slip off, and wake up feeling refreshed and energized. The Bed Scrunchie’s innovative 360-degree tightening system keeps your sheets smooth, tight, and secure all night long—no more adjusting in the middle of the night!
Easy to use, it fits any size bed and ensures wrinkle-free comfort for a perfect sleep experience. Designed for durability and convenience, the Bed Scrunchie is machine-washable and crafted from premium materials to withstand nightly use. Whether you're a restless sleeper or simply want your bed to look and feel pristine, this is the product you’ve been waiting for. Get yours today and enjoy better sleep, comfort, and mornings full of energy.
37. Peppy Pet Ball - The “Smart” Ball That Keeps Your Dog Engaged, Entertained, and Happy
This little wonder is a tough, tear-resistant toy ball that's designed to endure some serious chewing while keeping your furry friend happy and occupied all by itself.
Thanks to its hidden motion sensors, the fun begins the moment your dog lays a paw on it, launching an epic game of automatic fetch.
With the Peppy Pet Ball in the picture, your four-legged buddy will be having a blast for hours, even when you're not there to join in on the fun!
38. Wrist Sync - We Tested Over 50 Smart Watches and There Was One Clear Winner For Those Who Prioritize Wellness and Comfort
Do you want to monitor your vitals for better quality of life and peace of mind? Wrist Sync combines the benefits of a fitness tracker, smartwatch, and health monitor all into one. Whether business or casual, Wrist Sync is adaptable—perfect for outings with friends or while working. Designed for everyday use, it features durable and flexible comfort bands and a water-resistant casing.
Its advanced technology gives you instant hands-free access to check missed calls, text messages, and more. Super simple to set up, it makes staying connected effortless. They're currently running a huge sale, so don’t miss out, click here to take advantage of major deals.
39. Blissy - Sleep On This Comfy Silk Pillowcase For Better Sleep, Hair and Skin
First, imagine that you're always sleeping on the cool side of your pillow. Now imagine that your pillowcase is not only silky soft comfortable but can also help to improve your hair, skin and sleep quality. Blissy Pillowcase is one of the best-kept secrets recommended by hair stylists, dermatologists and beauty experts alike.
These aren't just amazingly comfortable pillow cases, there's something else special about them! Blissy is made from 22 Momme Mulberry silk (one of the highest quality silks you can buy), making it dreamy-soft and smooth. But sleeping with Blissy also has a lot of added benefits:
-
Sleep cooler since the silk has natural cooling properties so you don't have to flip your pillow
-
Reduce hair damage. Silk has less friction than other materials which means shinier and healthier hair
-
Help with skin problems. Since your face won't be rubbing up against a scratchy pillowcase.
-
Naturally hypoallergnic silk can help people with allergies, helps alleviate itchy eyes and stuffy sinuses.
40. Chill Pill - The Handheld Device That Helps You Fall Asleep in Minutes
If you use sleeping pills on a regular basis, you probably already know they’re not a smart, long-term solution.
Sleeping pills can increase your risk of death by 4.6X — and they often don’t even improve the quality of your sleep!
That’s why we’ve been recommending The Chill Pill lately. It’s a new handheld device (NOT an actual pill) that you hold in your hand while you go to sleep. It sends safe electronic pulses that calm your brain and help lull you into a deep sleep in just a few minutes. If you struggle to sleep quickly at night (or find yourself waking up frequently), this could be the innovation you’ve been waiting for!
✅ Delivers pulses of low-intensity electric currents that help you fall asleep FAST — and STAY asleep!
✅ Backed by science & tested to be completely safe.
✅ Easy to use — simply hold onto the device as you go to sleep!
✅ Also helps reduce anxiety and panic attacks.
✅ Helps restore balance to your brain’s neurochemicals, improving your sleep quality over time.
41. Jet Surge - Clean Your Driveway 10x Faster (In Under 5 Minutes)
The all-new Jet Surge – High Pressure Power Washer is used to clean dirt and mold off wood, car, tires, glass, concrete, window, patio, decks and more. Clean your windows to crystal clear as well! It comes fully adjustable to 2 different spray shapes… one to give you a strong jet stream to power clean and the other for a gentle spray to water delicate plants.
It’s just a one-time cost for a lifetime of clean walkways and driveway — currently 50% off here.
42. Ion Pure - Your Home Might Be Making You Sick (Here's the Answer)
During the fall and winter seasons, we tend to spend a significant portion of our time indoors. Regrettably, our beloved homes, which we hold dear, might be posing health risks.
Recent EPA findings suggest that indoor air quality has deteriorated due to the proliferation of energy-efficient building designs that lack proper ventilation. Additionally, the increased use of synthetic materials in buildings and furniture has led to the release of harmful chemicals.
Surprisingly, the concentration of indoor pollutants can be 200 to 500% higher than what’s found outside. This is where Ion Pure comes into play.
This groundbreaking solution, introduced in 2024, effectively diminishes airborne pollutants like dust, bacteria, and chemicals before we inhale them.
This user-friendly, plug-in negative ion generator eliminates the need for filters and accomplishes the removal of up to 97% of pollutant particles within a mere 30 minutes.
In fact, one of our writers, who suffered from daily nasal congestion and sleep disruption due to severe stuffiness, found respite upon installing Ion Pure in her home.
43. Light Bulb Camera - Homeowners Are Trading in Their Doorbell Cams for This
The Lightbulb Camera is a serious deterrent for any bad guys who are scoping out your home, but doorbell cameras can be low quality, easy to hack, and charge you expensive monthly fees!
These nearly unhackable High Definition Lightbulb cameras are able to track motion, have night vision, and you’re able to completely control the direction it’s looking at. It’s like a super version of a doorbell camera, but for a fraction of the price. Just connect it to your home WiFi, and you can control it and watch the video stream from any iPhone & Android Device. It also has a slot for a 64 GB SD Card, so you don’t have to waste money on monthly payments.
44. My Happy Feet Socks - These Miracle Socks Are Undoing a Lifetime of Damage in Days
If you have foot pain, you know how debilitating it can be.
It’s great for your health to be active – but decades of modern, sedentary lifestyles (along with poor-fitting footwear) can cause toes to become misaligned and move out of place.
As a result, feet become tender, sore, and weak.
Jill Towner – a retiree herself – wouldn’t have it, though. And after years of trying, she came up with what some people call “miracle socks.”
They’re designed to improve your circulation, reduce swelling, and decrease your foot pain over time.
Her “My Happy Feet Socks” are designed to provide relief from foot pain caused by everyday life and get you moving again.
And based on the positive reviews and recommendations from Podiatrists, doctors, and even yoga experts, they clearly do the job!
If you have foot pain that’s keeping you from fully enjoying life,you should try using these My Happy Feet Socks, you don’t believe the difference they can make.
45. Pocket Hose Copper Bullet - If You Want to Step Up Your Gardening Game, This is a Must-Have (As Seen on TV)
Imagine never dealing with kinks, leaks, or tangles again. Richard Karn's new hose makes that possible! It's super lightweight and durable, perfect for seniors or anyone with a weaker grip.
It expands and contracts easily, making it so convenient to use, plus, it has a non-toxic lining, so it’s safe for kids to play with and even drink from.
If you order now, you'll get a free ergonomically designed spray nozzle with 10 unique spray patterns, and the best part? There's a 50% discount available for a limited time!
46. Derila Memory Foam Pillow - The Solution For Millions Of People Who Sleep With Pain
If you sleep and wake up with pain in your neck, back, or legs, then your pillow may be the culprit.
Traditional pillows don’t offer much in the way they support your head or neck and can cause you a whole world of pain, not to mention waking up feeling stiff and cranky.
I learned this the hard way, I never would have guessed that my big fluffy pillow was the root cause of all my aches and pains until I switched to a Derila Memory Foam Pillow.
Derila’s unique shape and materials are able to support your head and neck and keep your spine aligned while you sleep. The result is relief from aches and pains, but also better sleep!
This pillow will absolutely change the way you sleep the first time you use it. I was skeptical until I tried it, but it really does work, I’m never going back to my old pillow again.
47. Opti Scope - The US Army Recently Partnered With This Military Grade Vision Device After Being Blown Away In Demo
Smartphone camera technology has come a long way, putting a nearly pro-quality camera in everyone’s hands. But now, literally any shot you want to capture is possible with professional quality using the Opti Scope — letting you capture every rare, stunning, once-in-a-lifetime shot in crystal clear HD.
Opti Scope gives you the zoom power of military-grade surveillance scopes, right on your smartphone. Just attach it to your phone, and amazing details, whether near or far, that used to be impossible to capture, are now easy to shoot in sharp detail, click here to get yours before they sell out.
48. Keyzmo - An Entire Toolbox In A Single Key
Are you tired of finding yourself without that one crucial tool that you really need? Do you keep losing your Philips screw driver? Do you think the Swiss army knives and leathermans of the world are too bulky and keep getting you stopped for security checks?
Well it’s your lucky day because 2024’s top gadget is finally here to save the day.
They call it the Keyzmo, and it truly is ingenious. Keyzmo is a 16-in-1 multi-tool that combines all your essential tools into one simple key you can carry anywhere.
Slide it onto your keychain, spin it around and never have to worry about mundane normal people problems ever again.
49. Blaze WiFi Booster - Never Have WiFi Dead Zones At Home Again!
Do you also hate having slow Internet and losing the WLAN connection in some rooms? Nothing is worse than Internet sites that load forever and videos that don't start.
With Blaze WiFi Booster you can ensure that your entire home is optimally covered, no matter how far away you are from the router! Blaze Wifi Booster improves not only the WLAN signal strength in your home, but also the Internet speed! A device that everyone should have in their home.
50. Aculief - Fast, Drug-Free Headache and Migraine Relief
Taking a painkiller every time your headache or migraine attacks can bring you side effects and health risks. It's time you look for a better pain relief alternative that really works.
Aculief is a patented, award-winning acupressure device that provides drug-free headache and migraine relief – FAST!
Aculief is placed right on your hand. It utilizes the body's natural endorphins to relieve headaches and tension. It works by applying pressure to the LI4 acupressure point, which has been used for thousands of years to treat headaches and provide tension relief.
With Aculief, there’s nothing to ingest and no harmful side effects. Just proven science that provides natural and fast pain relief.
51. X-All Foaming Toilet Cleaner - No Time For Cleaning? X-All Has Your Back—Just Pour, Flush, And Let It Work Its Magic!
No scrubbing, no hassle — X-All’s powerful foaming formula breaks down grime, rust, and calcium deposits with ease. In just minutes, your toilet is left sparkling clean and fresh without any effort on your part. Plus, X-All is eco-friendly and safe for both your plumbing and septic system, so you can clean guilt-free.
Say goodbye to harsh chemicals and exhausting scrubbing. X-All is the quick, effective, and environmentally friendly solution that leaves your toilet hygienic and gleaming. Just pour, flush, and relax — X-All has you covered. Get yours today and experience the easiest clean ever!
52. Splash Spotless Washing Machine Cleaner - Did You Know You’re Supposed to Clean the Things That Cleans Your Things?
That’s right—your washing machine needs a little TLC too, and Splash Spotless Washing Machine Cleaner is here to make it easier than ever. Over time, detergent residue, dirt, and grime build up in your washing machine, leading to bad smells and affecting how clean your laundry gets.
With Splash Spotless Washing Machine Cleaner, you can effortlessly deep clean those hidden areas, banishing odors and buildup to keep your machine running fresh and your laundry spotless. It’s incredibly easy—just drop it in, run a cycle, and let Splash Spotless do the work.
Regular use not only leaves your washer smelling fresh but also extends its life and performance, ensuring cleaner clothes and saving you money. Get ready to experience laundry like never before with Splash Spotless.
53. Splash Multi-Purpose Spray - A Tablet That Transforms Water Into A Powerful, Natural Cleaner For Every Surface In Your Home
Meet Splash Multi Purpose Spray – a simple tablet that turns water into a powerful, non-toxic cleaner for every surface in your home. From countertops and floors to windows and showers, Splash uses natural surfactants to break down dirt, grease, and grime with ease. Safe for your family, pets, and the environment, Splash delivers heavy-duty cleaning without harsh chemicals.
Say goodbye to cluttered cabinets full of cleaning supplies. With Splash, one tablet is all you need to keep every room in your home sparkling clean, sanitized, and fresh-smelling. Convenient, eco-friendly, and highly effective, Splash is the smarter way to clean. Make the switch today and experience the power of nature in every drop.
54. Pee Buster - Pet Owners Everywhere Are Obsessed With Peebuster’s Scent Shield For Its Fast, Safe, and Hassle-Free Pet Mess Cleanups
The one thing dog and cat owners can agree on? Pee Buster — the game-changing pet stain and odor remover everyone is raving about! With its revolutionary Scent Shield Technology, Pee Buster doesn’t just cover up odors and stains — it eliminates them completely.
No more scrubbing for hours or worrying about harmful chemicals. Pee Buster’s quick, safe, and easy solution is perfect for middle-aged homeowners who want an efficient cleanup without compromising the safety of their pets or family. Say goodbye to lingering smells and tough stains. With Pee Buster, you get a fast, hassle-free clean that leaves your home fresher than ever. Try Peebuster today and experience the difference for yourself
THIS IS AN ADVERTISEMENT AND NOT AN ACTUAL NEWS ARTICLE, BLOG, OR CONSUMER PROTECTION UPDATE
MARKETING DISCLOSURE: This website is a market place. As such you should know that the owner has a monetary connection to the product and services advertised on the site. The owner receives payment whenever a qualified lead is referred but that is the extent of it.
ADVERTISING DISCLOSURE: This website and the products & services referred to on the site are advertising marketplaces. This website is an advertisement and not a news publication. Any photographs of persons used on this site are models. The owner of this site and of the products and services referred to on this site only provides a service where consumers can obtain and compare.
lifehackin.com ©2024 All Rights Reserved.